
Contents: How To, Main Page
Step 5 Mounting the dome to the lower jaw will be the next task. Here is where the puzzle starts coming together.
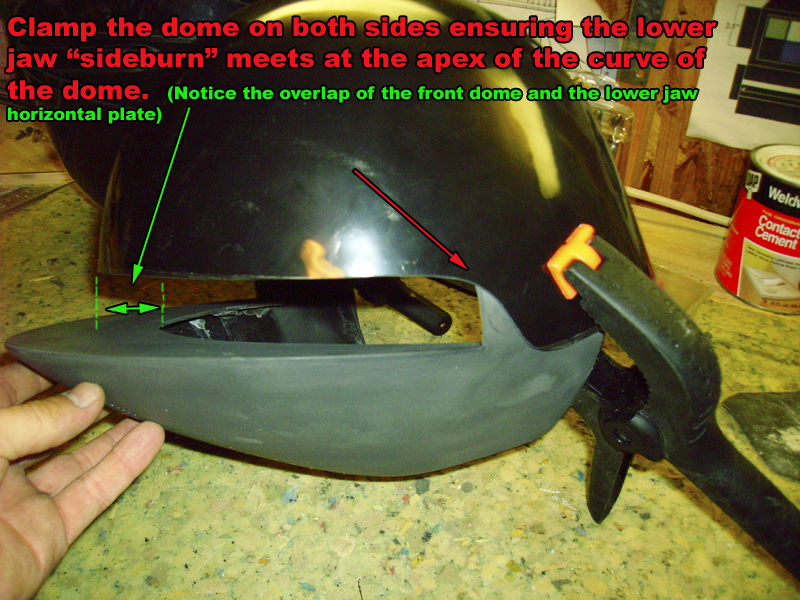
Image 11 (Jaw to Dome mount) I can not say it enough...TAKE YOUR TIME. This stage of construction is critical to ensure the rest of the helmet goes together without a hitch. You will see multiple photos below about measuring before drilling...take heed! Notice the lower jaw after the initial rough sanding and primer application?

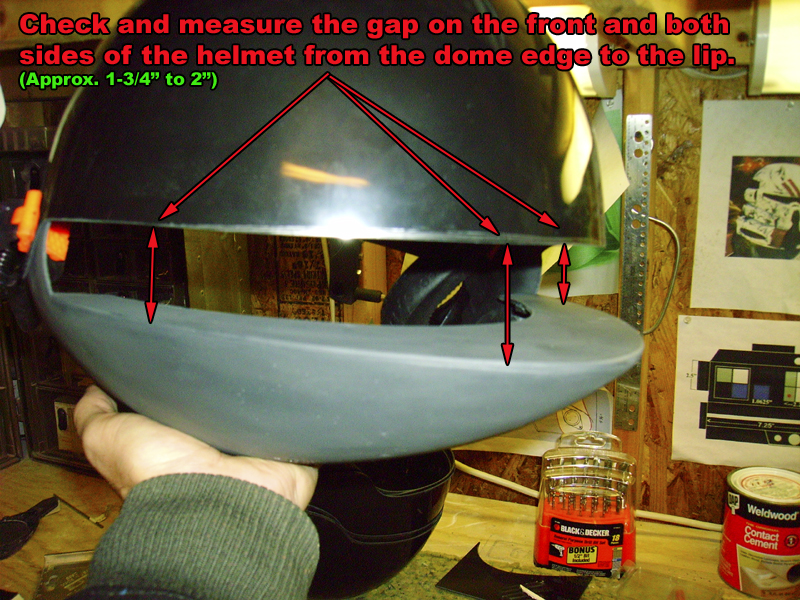
Image 12 (Jaw to Dome mount) cont. In order to get the lens set properly you need to have an even viewing portal from the wearer's vantage point. Not to mention, you don't want the helmet to look like a kitchen garbage can...you know the one I'm talking about; step on the pedal and the lip opens. Due to the perspective of the camera and the viewing angle, this does not look evenly measured across the entire dome brow and lip...trust me, it is!

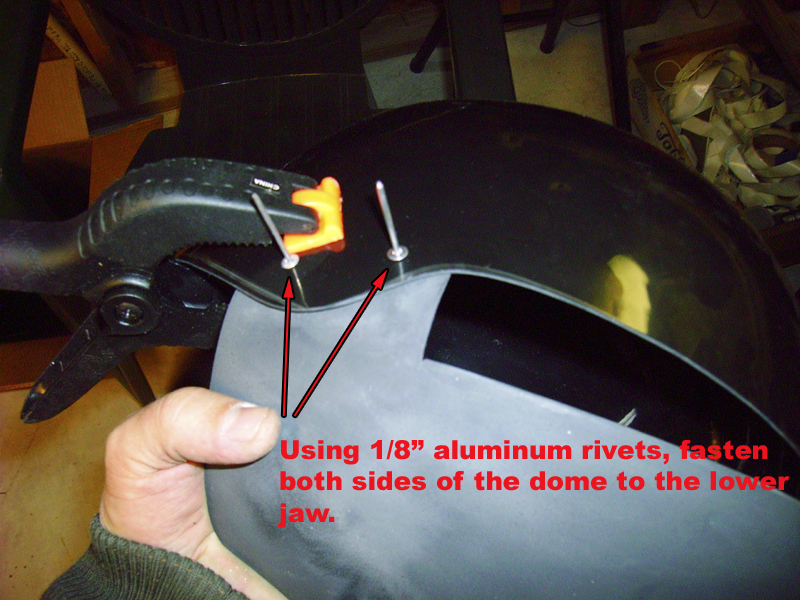
Image 14 (Jaw to Dome mount) cont. Finally, drill two 1/8" holes on each ear and fasten the lower jaw to the dome via the sideburn. Ensure you drill the holes through both pieces. I highly recommend drilling the front hole on each side first. Applying one rivet at a time. Then go back to insert the rear rivets. This will allow for any final minute adjustments before you snap the last rivet. Don't forget to use washers on the backside of the rivets or the rivets will pull through the plastic when you snap them.

Take a break, there will be more to follow; including the scoop mount, com box preparation, com box mounting, lens mounting, and final detailing. Check back later for updates.