
Contents: How To, Main Page
Step 3 The most painful part of the Gunner Helmet construction may be the lower jaw assembly (if you choose this technique for assembly). I did, and the following process is what I recommend in order to obtain that "seamless" appearance of the one piece jaw.
Image 2 (Jaw Assembly) Shown here is the upper lip plate of the lower jaw blast shield. This will be one of your "all too often" viewed items when donning your completed helmet. You know, the part that prevents you from seeing steps, children, small animals and so forth.
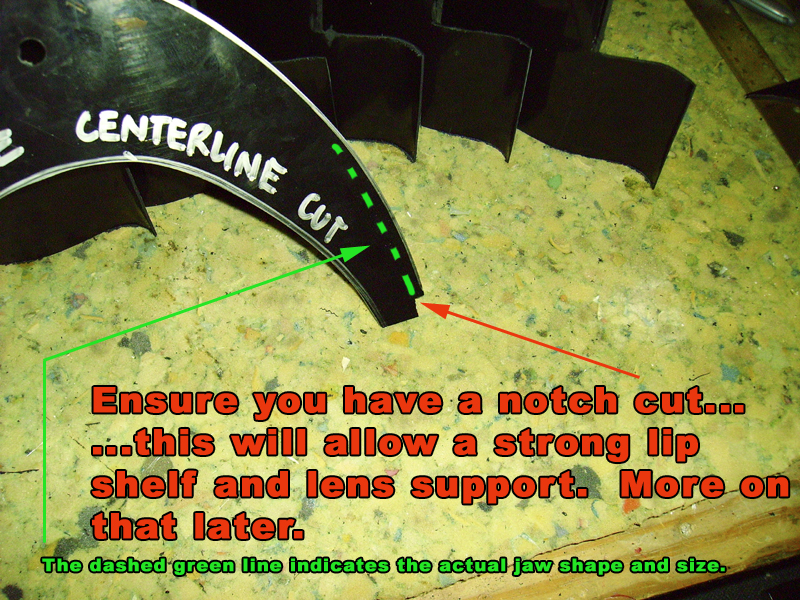
Image 3 (Jaw Assembly) cont. Trial fit the lower jaw scoop with the upper lip plate to validate a snug fit with no gaps between the lip plate and lower jaw scoop itself.
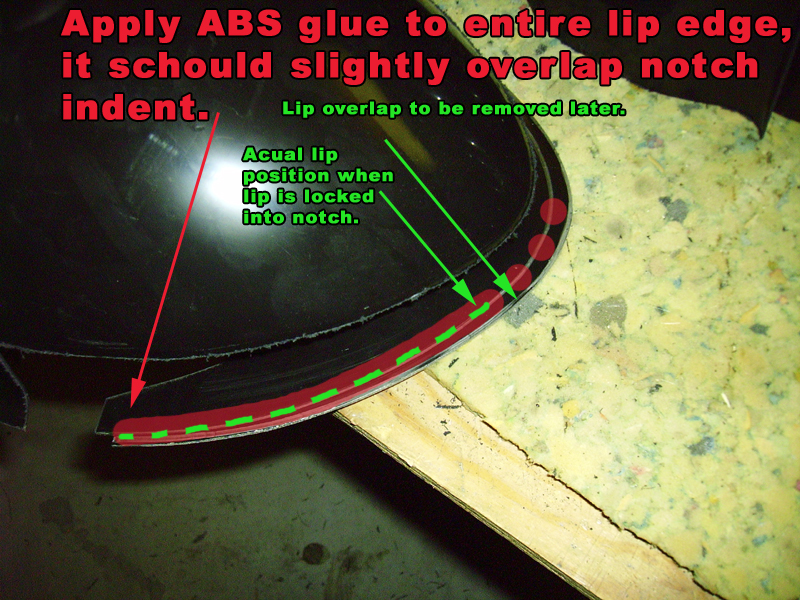
Image 4 (Jaw Assembly) cont. Using the adhesive of your liking, secure the plate and jaw together allowing ample time for both parts to dry before moving to the next phase of construction.

Image 5 (Jaw Support) Once the lip and lower jaw adhesives have cured we will further strengthen our lip. We need structural integrity in our upper lip to prevent separation of the two pieces when parading around in costume and when we possibly (more than likely) walk into walls, people, or other immovable objects. The next (2) photos below show a very simple yet effective process for building structural bridges, which will later be glued and inserted into the lower jaw.


Image 6 (Jaw Support) cont. This next picture should help illustrate the process better. I glued one bridge dead center of the lower lip assembly, then one on each side near the back of the lip approximately 1" from the back of the lip upper plate. I then glue one between the already installed bridges on each side... ...staggered; if you will. Why the 1" spacing on the rear bridges? Read on! Oh yeah, the leaf blower in the lower picture is not used in the helmet construction process...my prop building space and lawn and garden tools storage are one in the same. It beats having the wife pummel me with kitchen items for ruining her dining room table!

Image 7 (Jaw Support) cont. Now, to give that final "Ummmphh" in strength and rigidity lets add some Plastic Weld to the equation. Mix and apply some Plastic Weld behind the two rear bridges to fill in that 1" lip space we planned for earlier. INSIDE the lower jaw! Is that description good enough? aw hell, you know I have another picture around here somewhere...
...still looking...
...ah, here it is, Maybe this will help!

Not bad for now...you've made some real progress! If you still have the energy to continue just click the text below for the next phase.